Entering into the World of Wildlife Photography
Wildlife photography, a mesmerizing blend of art and adventure, offers a unique way to capture the raw beauty of nature. Through the lens, we can document the intricate behaviors of animals, the serene landscapes they inhabit, and the fleeting moments that define their existence. As an avid wildlife photographer, I have journeyed through various terrains, from dense forests to arid deserts, each experience enriching my understanding of this captivating field. In this guide, I’ll share my insights and techniques, providing you with a comprehensive roadmap to mastering wildlife photography.
The Magic of Wildlife Photography
Wildlife photography is a captivating blend of art and science, demanding both technical skill and an intuitive understanding of the natural world. The magic lies in your ability to capture the raw essence of nature, immortalizing moments that reveal the beauty, struggle, and intricacy of wildlife.
Capturing Emotion and Behavior
The power of wildlife photography comes from its ability to convey emotion and behavior. A photograph of a lioness tenderly grooming her cubs or a bird in the midst of an elaborate courtship dance tells a story that words cannot fully express. These images connect viewers emotionally to the subjects, fostering a deeper appreciation for wildlife.
Showcasing Biodiversity
Wildlife photography showcases the incredible diversity of life on Earth. From the largest of mammals to the tiniest of insects, each photograph highlights the uniqueness of species and their roles in the ecosystem. This visual documentation is crucial for raising awareness about biodiversity and conservation efforts.
Moments of Serendipity
The unpredictability of wildlife photography adds to its allure. Unlike controlled studio environments, the natural world is full of surprises. Capturing an unexpected moment, such as a sudden interaction between species or a dramatic display of behavior, can result in some of the most compelling and memorable images.
Enhancing Conservation Efforts
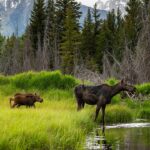
Wildlife photography plays a significant role in conservation. By highlighting the beauty and fragility of wildlife, photographers can inspire action and support for conservation initiatives. Powerful images can draw attention to endangered species and threatened habitats, prompting public interest and advocacy.
Technical Challenges and Rewards
The technical challenges of wildlife photography, such as difficult lighting and fast-moving subjects, make successful shots even more rewarding. Mastering these challenges requires skill, patience, and persistence. Each well-executed photograph is a testament to the photographer’s dedication and expertise.
Fostering a Connection with Nature
Engaging in wildlife photography fosters a deep personal connection with nature. Photographing and observing wildlife in their natural habitats enhances one’s understanding and appreciation of the natural world. This connection often leads to a lifelong passion for wildlife and conservation.
Preparation and Planning
Effective wildlife photography begins with thorough preparation and meticulous planning. Understanding the environment, species, and technical requirements sets the foundation for capturing remarkable images.
Research and Location Scouting
Researching your subject is the first critical step. Learn about the species’ habits, habitats, and behaviors. Study their feeding, mating, and migration patterns to anticipate their movements. Use resources such as wildlife documentaries, scientific journals, and online databases to gather detailed information.
Location scouting is equally important. Visit potential sites beforehand to familiarize yourself with the terrain and identify promising vantage points. Note the availability of cover, natural blinds, and the direction of sunlight at different times of the day. This reconnaissance helps you plan your shoots more effectively and increases your chances of successful encounters.
Understanding Weather and Light
Weather conditions and light quality are pivotal in wildlife photography. Monitor weather forecasts to plan your outings around favorable conditions. Overcast days provide diffused light that reduces harsh shadows, while clear skies during golden hours (early morning and late afternoon) offer warm, soft light ideal for capturing vivid images.
Light direction and intensity vary throughout the day. Position yourself to make the most of natural light, using backlighting for dramatic silhouettes or side lighting to highlight textures and details. Understanding how light interacts with your subject enhances the visual impact of your photos.
Timing and Seasonal Considerations
Timing your shoots to coincide with animal activity is crucial. A majority of species are most active during dawn and dusk, making these periods ideal for photography. Plan to arrive well before these peak times to set up and be ready for action.
Seasonal changes also influence wildlife behavior. Migration, breeding, and birthing seasons present unique opportunities to capture rare behaviors and interactions. Research the seasonal cycles of your target species and plan your trips accordingly to maximize your chances of witnessing these events.
Equipment Readiness
Ensure all your equipment is in optimal condition before heading out. Check your camera settings, clean your lenses, and charge all batteries. Pack extra memory cards, batteries, and any other necessary accessories. Consider the specific needs of the environment you will be in, such as waterproof gear for wet conditions or extra insulation for cold climates.
Creating a Shot List
Develop a shot list to guide your photography sessions. Identify specific behaviors, compositions, and scenes you aim to capture. While wildlife is unpredictable, having a clear set of objectives helps maintain focus and direction during your shoots.
Physical and Mental Preparedness
Wildlife photography can be physically demanding, requiring long hours of waiting in uncomfortable positions. Prepare yourself physically by wearing appropriate clothing and carrying necessary supplies, such as water, snacks, and first aid kits. Mentally, cultivate patience and resilience. The best shots often come to those who are willing to wait and observe quietly for extended periods.
Ethical Considerations and Permissions
Respect for the wildlife and their habitats is paramount. Ensure you have the necessary permits and adhere to local regulations. Avoid disturbing animals, especially during sensitive times like mating or nesting. Practice proper and ethical photography by maintaining a safe distance to minimize your impact on wildlife and the environment.
By meticulously preparing and planning your wildlife photography outings, you set the stage for capturing extraordinary images that reflect the true essence of the natural world.
Essential Equipment for Wildlife Photography
Equipping yourself with the right tools is crucial for successful wildlife photography. The following gear enhances your ability to capture sharp, compelling images in various conditions.
Cameras and Lenses
A camera with an extremely fast autofocus system and high burst rate is essential. DSLRs and mirrorless cameras with these capabilities allow you to capture quick, decisive moments. Models with good high-ISO performance are advantageous for shooting in low-light conditions.
Telephoto lenses are indispensable for wildlife photography. Lenses with focal lengths ranging from 350mm to 800mm enable you to photograph distant subjects without disturbing them. Zoom lenses offer flexibility in framing, while prime lenses typically provide sharper images and wider apertures. Consider lenses with image stabilization to counteract camera shake and produce clearer images.
Tripods and Stabilization Tools
Stability is key to sharp wildlife photographs. A sturdy tripod with a ball head or gimbal head offers excellent support and smooth movement, essential for tracking fast-moving animals. For more mobility, a monopod provides stability with the flexibility to move quickly.
Bean bags are useful for stabilizing your camera on uneven surfaces or vehicle windows. These portable supports are particularly helpful for low-angle shots or when you need to reduce weight in your gear setup.
Other Must-Have Accessories
Camera Rain Cover: Protects your gear from adverse weather conditions, ensuring you can continue shooting in rain or snow.
Extra Batteries and Memory Cards: Long hours in the field can quickly drain batteries and fill memory cards. Carrying spares ensures you won’t miss crucial moments due to power or storage limitations.
Binoculars: Essential for spotting wildlife from a distance and planning your approach without disturbing the animals.
Camouflage Gear: Clothing and blinds that blend into the environment help you remain inconspicuous, reducing the chance of startling wildlife. Portable blinds can be set up to create a concealed shooting position.
Remote Shutter Release: Reduces camera shake when shooting with long lenses or in low-light conditions. Wireless options allow you to trigger the camera from a distance, which is helpful for capturing skittish animals.
Lens Cleaning Kit: Dust and moisture can degrade image quality. A cleaning kit with a blower, lens cloth, and cleaning solution helps maintain your equipment’s performance in the field.
GPS Device: Useful for marking locations and tracking movements in unfamiliar terrains. Some cameras have built-in GPS, which can be beneficial for organizing and geotagging your photos.
Carrying Solutions
Backpacks: A well-designed camera backpack distributes weight evenly and provides compartments for organizing your gear. Look for weatherproof options with easy access to your equipment.
- Dimension:17.32 x 11.8 x 7.5 inch. 2 compartments included. Padded removable modular inserts in the…
- Full open design. 2 accessory pockets on the back face can store cables, sd cards, powerbank and…
- With waterproof PU leather hardshell protection in front. The foam padded layer can provide good…
Chest Harness: Offers quick access to your camera while distributing the weight to your shoulders and back. This can be especially helpful during long hikes or when you need to react swiftly.
Specialized Equipment
Drones: Drones equipped with high-quality cameras can capture unique aerial perspectives of wildlife and their habitats. Ensure you comply with all local regulations and avoid disturbing animals with the drone’s presence.
Trail Cameras: These motion-activated cameras are excellent for monitoring wildlife activity in specific locations. They provide insights into animal behavior patterns and can inform your shooting plans.
By selecting the right gear, you can enhance your chances of capturing stunning wildlife images regardless of the conditions you encounter in the field.
Techniques and Tips
Mastering wildlife photography requires a combination of technical skills and fieldcraft. Here are essential techniques and tips to elevate your wildlife photography.
Composition and Framing
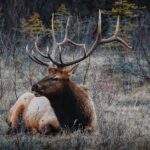
Effective composition directs the viewer’s attention and tells a compelling story. The rule of thirds is a foundational guideline, placing the subject slightly off-center to create a more dynamic image. Leading lines, such as branches or paths, guide the viewer’s eye toward the subject.
Use natural frames, like foliage or rocks, to add depth and context. Ensure the animal’s eyes are sharply in focus as they draw immediate attention. Filling the frame with your subject will create intimate portraits or include surrounding elements to show the animal in its environment.
Focusing and Exposure
Wildlife photography often involves fast-moving subjects. Use continuous autofocus (AI-Servo or AF-C) to maintain focus on moving animals. Select a high burst rate to capture multiple frames per second, increasing the likelihood of obtaining a sharp image.
Adjust your exposure settings based on lighting conditions. A fast shutter speed, typically 1/1000 second or faster, freezes motion. In low light, increase the ISO to maintain a fast shutter speed while being mindful of potential noise and using aperture priority mode to control depth of field. This keeps the subject sharply focused while blurring the background.
Using Natural Light
Natural light is a key element in wildlife photography. The golden hour, which occurs shortly after sunrise and before sunset, provides a warm, soft light that enhances colors and textures. Backlighting creates dramatic silhouettes and highlights fur or feathers.
In harsh midday light, use shadows to your advantage, positioning animals against shaded backgrounds to reduce contrast. Overcast days offer diffused light, eliminating harsh shadows and providing even illumination.
Creative Techniques
Experiment with creative techniques to add variety to your portfolio. Panning requires moving the camera to follow a moving subject; using a slower shutter speed will blur the background while keeping the subject in focus. This technique conveys motion and speed.
High-key and low-key photography uses extreme lighting to create striking images. High-key images are bright and ethereal, often with minimal shadows, while low-key images are dark and dramatic, emphasizing contrasts.
Post-Processing Your Wildlife Photos
Post-processing is a vital step in wildlife photography, enhancing the raw images to reveal their full potential while maintaining the authenticity of the scene. Here’s a detailed guide to effective post-processing techniques.
Initial Adjustments
Begin by importing your photos into editing software like Adobe Lightroom or Capture One. Start with global adjustments to correct exposure, contrast, and white balance. Adjusting the exposure to ensure the image is neither too dark nor too bright. Increase contrast to add depth and make the subject stand out.
Correct the white balance to achieve accurate colors by using the eyedropper tool to select a neutral area of the photo or manually adjust the temperature and tint sliders. Fine-tuning these settings ensures natural-looking colors that reflect the scene’s reality.
Cropping and Straightening
Crop your image to improve composition and remove distracting elements. Following compositional rules like the rule of thirds places the subject in a visually appealing position. Straighten the horizon line if necessary to ensure the image looks balanced and professional.
When cropping, maintain the original aspect ratio to avoid distortion. Be mindful of the resolution and ensure the cropped image retains enough detail for your intended use, whether for prints or digital displays.
Enhancing Details
Detail enhancement makes your subject pop. Use sharpening tools to emphasize textures in fur, feathers, or eyes. Apply sharpening selectively to avoid increasing noise in the background. In Lightroom, use the masking slider while holding the Alt key to visualize which areas will be sharpened.
Noise reduction is essential for high-ISO images. Use noise reduction tools to smooth out grainy areas while preserving important details. Balance luminance and color noise reduction to maintain natural textures without introducing unwanted artifacts.
Adjusting Colors
Refine colors to make the image more vibrant and true to life. Use the HSL (Hue, Saturation, and Luminance) panel to adjust individual colors. Increase the saturation and luminance of the subject’s colors to draw attention while toning down distracting hues in the background.
For more precise control, use selective color adjustments or radial filters. These tools help you to enhance specific areas of the image without affecting the whole frame. Be subtle in your adjustments to maintain a natural look.
Highlight and Shadow Recovery
Recovering highlights and shadows can bring out details in both the brightest and darkest areas of your image. Reduce highlights to regain details in bright areas like the sky or reflections on the water. Increase shadows to reveal details in underexposed areas, such as the fur or feathers in shadowed parts of the animal.
Use the histogram to guide your adjustments, ensuring a balanced exposure without clipping highlights or shadows. This helps retain a full range of tones, contributing to a well-balanced image.
Vignetting and Graduated Filters
Apply vignetting to draw attention to the subject. A subtle darkening of the image’s edges focuses the viewer’s gaze on the center. Adjust the amount, midpoint, and feathering to achieve a natural effect that enhances the composition.
Graduated filters are useful for adjusting specific areas of the image, such as darkening an overexposed sky or brightening the foreground. These filters allow for smooth transitions and localized adjustments, improving the overall balance and mood of the photo.
Cloning and Healing
Use cloning and healing tools to remove small distractions or imperfections, like dust spots or stray branches. In Lightroom, the spot removal tool offers both healing and cloning options. Healing blends the area with surrounding pixels while cloning copies pixels from one area to another.
Avoid overusing these tools to maintain the authenticity of the scene. Focus on minor distractions that detract from the subject, ensuring that the image remains a truthful representation of the wildlife encounter.
Final Touches
Before exporting, make final adjustments to ensure the image is polished. Check for any remaining distractions, ensure the subject is sharp, and the colors are balanced. Add a slight contrast boost or a final color tweak if necessary.
Export your image at the appropriate resolution and format for its intended use. For web use, JPEG format with sRGB color space is standard. For prints, use a higher resolution and consider exporting in TIFF format with Adobe RGB color space to retain maximum detail and color accuracy.
By carefully applying these post-processing techniques, you can enhance your wildlife photos to highlight their best qualities while preserving the natural beauty of the scene.
Challenges and Solutions
Wildlife photography presents numerous challenges that require strategic solutions to overcome. Understanding and preparing for these challenges can greatly improve your ability to capture stunning images in the field.
Low Light Conditions
Low light is a common challenge, particularly during dawn, dusk, or in dense forests. To counter this, a camera with good high-ISO performance should be used to minimize noise. A fast lens with a wide aperture (f/2.8 or wider) allows more light to reach the sensor, enabling faster shutter speeds.
Using a tripod or monopod provides stability for longer exposures, reducing the risk of blur from camera shake. Additionally, employ noise reduction techniques in post-processing to clean up high-ISO images while preserving details.
Fast-Moving Subjects
Capturing fast-moving animals requires quick reflexes and appropriate settings. Use continuous autofocus (AI-Servo or AF-C) to maintain focus on moving subjects. Set a high burst rate to take multiple frames per second, increasing the likelihood of capturing a sharp, well-timed shot.
Pre-focus on an area where the animal is likely to appear. This technique, combined with a fast shutter speed (1/1000 second or faster), helps freeze motion and ensures crisp images.
Harsh Lighting Conditions
Harsh midday sunlight can create strong shadows and highlights. Position yourself to use the light to your advantage, such as backlighting for silhouettes or side lighting to emphasize textures. When shadows are too harsh, consider using fill flash or reflectors to balance the light on the subject.
On bright days, overexpose slightly to retain details in the shadows, then correct in post-processing. Alternatively, shoot in shaded areas where the light is softer and more diffused.
Getting Close to Wildlife
Approaching wildlife without causing a disturbance is challenging. Use long telephoto lenses (300mm or longer) to capture close-up shots from a distance. Employ camouflage clothing and hides (blinds) to blend into the environment, reducing the likelihood of startling animals. Utilizing game calls during the animal’s breeding season.
Move slowly and quietly, and always approach from downwind to avoid carrying your scent toward the animals. Using a remote camera setup with a wireless trigger allows you to capture close-up shots without being physically near the subject.
Weather Conditions
Adverse weather can impede photography but also provide unique opportunities. Rain, fog, and snow add atmospheric elements that enhance the mood of your images. Protect your gear with waterproof covers and pack desiccants to manage moisture.
Use weather-sealed equipment for better durability in harsh conditions. Always carry spare dry clothes and a towel to manage personal comfort and equipment maintenance.
Finding Wildlife
Locating wildlife requires patience and research. Study the habits and habitats of your target species to predict their locations. Use local guides, wildlife apps, and online resources to gather information on recent sightings and activity patterns.
Scout locations at different times to understand animal movements. Visiting watering holes, feeding grounds, and nesting areas increases your chances of successful encounters.
By recognizing these challenges and applying practical solutions, you can boost your wildlife photography skills and capture images that reflect the true beauty and diversity of the natural world.
Showcasing and Sharing Your Work
Displaying your wildlife photography correctly is crucial for gaining recognition and sharing the beauty of nature. Here are key strategies to showcase and share your work.
Creating an Online Portfolio
An online portfolio serves as a personal gallery where you can present your best work. Use platforms like Hostinger, Wix, or Adobe Portfolio to create a professional-looking website. Organize your photos into themed galleries, such as “Birds of Prey” or “African Safari,” to make navigation easier for visitors.
Make sure that your website loads quickly and is mobile-friendly. Include an “About” section to share your background and passion for wildlife photography. Provide your contact information and links to your social media profiles to facilitate connections with potential clients or collaborators.

Leveraging Social Media
Social media platforms are great tools for reaching a broad audience. Use Instagram, Facebook, and X to share your photos regularly. Post high-quality images with engaging captions that tell the story behind the shot.
Use relevant hashtags to increase visibility and connect with like-minded photographers and nature enthusiasts. Engage with your audience by responding to comments and participating in photography-related discussions. Hosting live sessions or tutorials can also help build a loyal following.
Participating in Photography Contests
Entering photography contests can boost your visibility and credibility. Look for reputable competitions like the Wildlife Photographer of the Year, National Geographic Photo Contest, or Audubon Photography Awards. Winning or even being shortlisted in these contests can lead to significant exposure.
Read the submission guidelines carefully and choose contests that align with your style and strengths. Use high-resolution images and ensure they meet the contest’s technical requirements. Highlight any accolades on your portfolio and social media profiles to enhance your professional reputation.
Printing and Exhibiting
Prints add a tangible dimension to your work. Offer high-quality prints for sale through your website or online marketplaces like Etsy. Choose professional printing services to ensure your images are presented with the best possible quality.
Participate in local or national exhibitions and art fairs to showcase your work to new audiences. Collaborate with galleries, nature centers, or wildlife organizations to host solo or group exhibitions. Prepare an artist’s statement and be ready to discuss your work with visitors to make a lasting impression.
Publishing in Magazines and Books
Getting published in magazines or books can significantly enhance your profile. Submit your work to wildlife and nature photography magazines like National Geographic, Outdoor Photographer, or BBC Wildlife Magazine. Follow their submission guidelines and tailor your pitches to fit their editorial style.
Consider self-publishing a photo book to showcase a cohesive body of work. Platforms like Blurb or Amazon Kindle Direct Publishing offer tools for creating and distributing your book. Promote your publication through your website, social media, and photography networks.
Collaborating with Organizations
Collaborate with wildlife conservation organizations to use your photography for a cause. Offer your images for their campaigns, websites, or educational materials. This not only supports conservation efforts but also introduces your work to a broader audience.
Partner with travel companies, nature reserves, or eco-tourism agencies to provide photos for their promotional materials. These collaborations can lead to paid assignments and additional exposure.
Utilizing Blogging and Content Creation
Start a blog to share tips, insights, and stories from your wildlife photography adventures. Blogging establishes you as an authority in the field and drives traffic to your website. Write about techniques, gear reviews, location guides, and personal experiences.
Create video content for platforms like Vimeo or YouTube. Tutorials, behind-the-scenes footage, and vlogs about your photography trips can attract a dedicated audience. Share your videos on social media and embed them in your blog to maximize reach.
By implementing these strategies, you can effectively showcase and share your wildlife photography, expanding your audience and enhancing your professional presence.
The Journey of Wildlife Photography
Embarking on the journey of wildlife photography is a path filled with awe-inspiring moments and learning experiences. Each encounter with the wild deepens our connection to nature and enhances our appreciation for the planet’s diverse inhabitants. Through perseverance, ethical practices, and continuous learning, you can capture the untamed beauty of wildlife and share it with the world.
FAQ Section
What camera settings are ideal for wildlife photography?
Use continuous autofocus and a fast shutter speed and adjust the aperture for the desired depth of field. High ISO settings can help in low light conditions.
How can I improve my chances of photographing elusive animals?
Research and patience are key. Understanding the animal’s behavior and being prepared to wait for the right moment can increase your chances.
What is the best time of day for wildlife photography?
Early morning and late afternoon are the best times due to the soft, diffused light that enhances the subject’s natural beauty.
How do I approach wildlife ethically?
Respect the animals and their habitat. Avoid disturbing wildlife, follow local regulations, and practice leave-no-trace principles.
What are the essential accessories for wildlife photography?
Essential accessories include a sturdy tripod, camera rain cover, extra batteries, memory cards, binoculars, and a camouflage blind.
Disclaimer: This blog post contains affiliate links

